X-Ray Positioning: Paranasal Sinuses
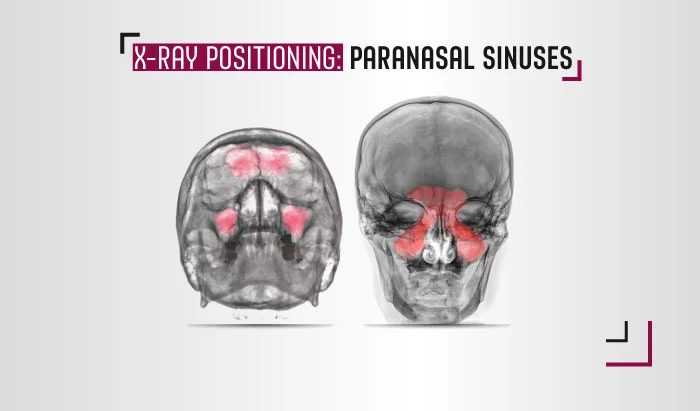
X-Ray Positioning: Paranasal Sinuses


The paranasal sinus x-ray is no longer a common procedure, but it is one that is still occasionally requested by physicians. For radiologic technologists receiving an order this relatively obscure imaging procedure: we’ve got you covered. This article is intended as a quick guide to X-ray positioning for imaging the paranasal sinuses. It provides information on patient preparation and positioning, tube positioning and centering point, technical parameters, criteria for successful imaging, and indications for each of the sinus X-ray views.
Paranasal Sinus Overview
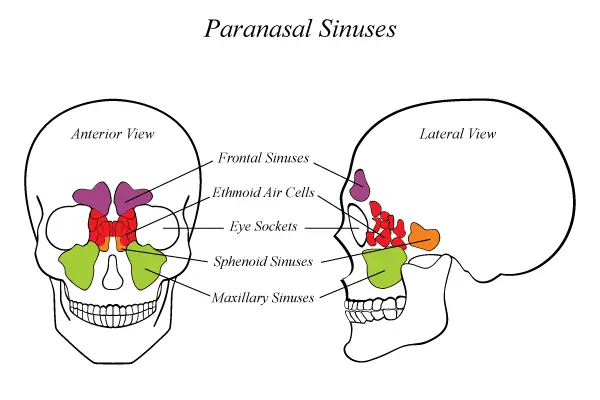
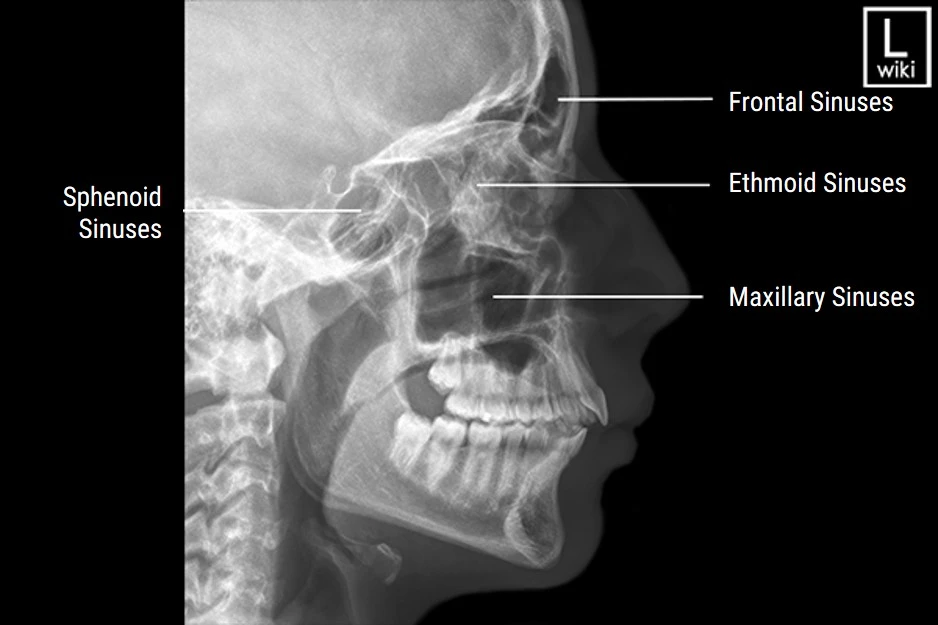
One of many small hollow spaces in the bones around the nose, paranasal sinuses are named after the bones that contain them: frontal (the lower forehead), maxillary (cheekbones), ethmoid (besides the upper nose), and sphenoid (behind the nose). The paranasal sinuses open into the nasal cavity (the space inside the nose) and are lined with cells that make mucus to keep the nose from drying out during breathing.
Paranasal sinuses also have various other functions, including lightening the weight of the head, humidifying and heating inhaled air, increasing the resonance of speech, and serving as a crumple zone to protect vital structures in the event of facial trauma.
Anatomy of the Skull
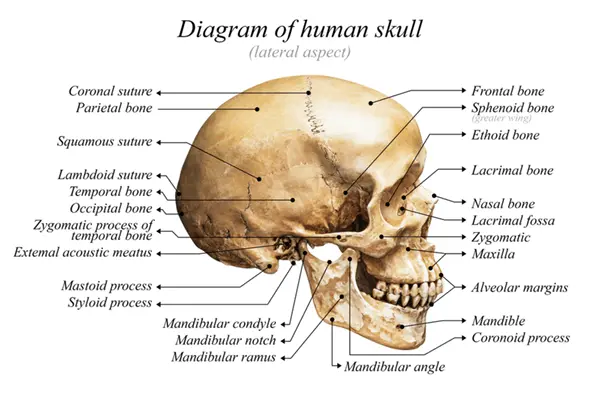
We’ll start with the basics: anatomy. The diagrams below provide a refresher on the anatomy of the skull, as well the anatomical names of the paranasal sinuses.
Radiographic Positioning
Now that we’ve refreshed your memory on the anatomy of the skull, below you will find a guide to radiographic positioning for lateral and posteroanterior X-ray views of the paranasal sinuses, including the technical parameters, patient positioning, tube and centering point, criteria for success, and indications.
Paranasal Sinuses X-Ray: Lateral View
- Check patient identity
- Check patient pregnancy risk
- Remove metal objects from hair, braces, earrings or piercings, necklaces, etc.
- Explain the exam to the patient
- Orientation: Portrait
- Detector and parameters:
- Detector size: Cassette size: 24 cm x 30 cm: 70-80 kV, 15-20 mAs
- Or Digital Panel Detector: 80 kV, 4-5 mAs
- SID = 100cm
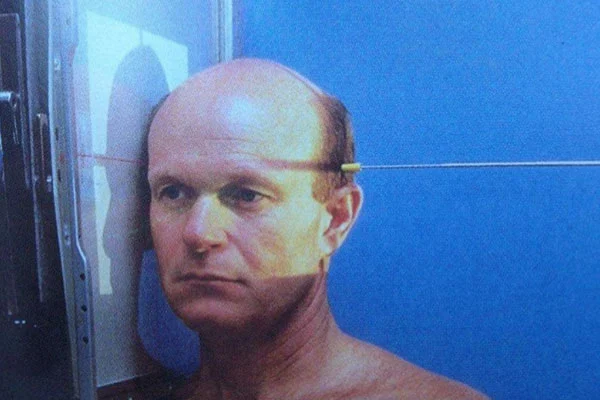
- Patient standing or seated facing the straight bucky
- Oblique the body slightly to assist with positioning and patient comfort
- Adjust the patient’s head into a true lateral position (palpate the external occipital protuberance posteriorly and the nasion or glabella anteriorly to ensure that these points are equidistant from the bucky)
- Align midsagittal plane parallel to the IR
- Align interpupillary line perpendicular to the IR
- Adjust the patient’s chin to bring the infra-orbitomeatal line perpendicular to the front edge of the IR
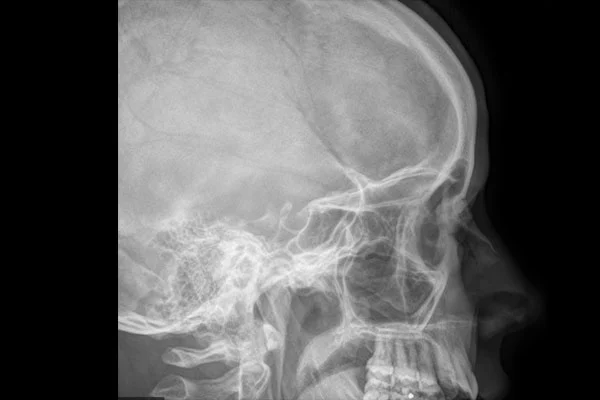
- Lateral projection
- Centering point: 2 cm posterior to the outer canthus
- Clear visibility of sphenoid sinuses, superimposed frontal, ethmoid, and maxillary sinuses, sella turcica, and orbital roofs
- Inflammatory conditions, e.g., sinusitis, secondary osteomyelitis, and sinus polyps
Paranasal Sinuses X-Ray: PA Caldwell View
- Check patient identity
- Check patient pregnancy risk
- Remove metal objects from hair, braces, earrings or piercings, necklaces, etc.
- Explain the exam to the patient
- Orientation: Portrait
- Detector and parameters:
- Detector size: Cassette size: 24 cm x 30 cm: 70-80 kV, 15-20 mAs
- Or Digital Panel Detector: 80 kV, 4-5 mAs
- SID = 100cm
- The patient is seated in front of the upright detector
- The patient’s forehead is placed against the image detector
- Forehead and nose are both touching the detector
- The orbitomeatal line is running perpendicular to the detector
- The petrous ridge is below orbits
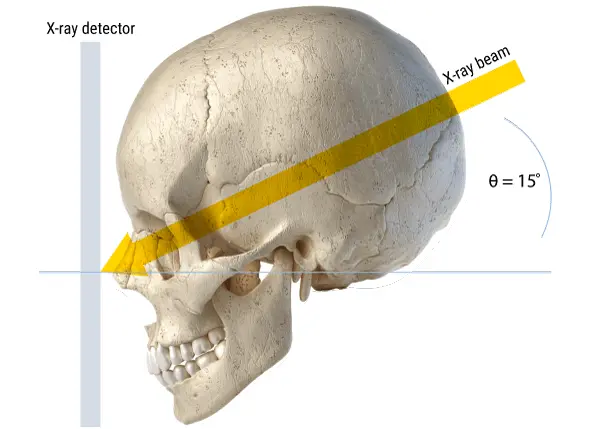
- Posteroanterior (PA) projection
- Centering point: angled caudad around 15° to exit at the nasion
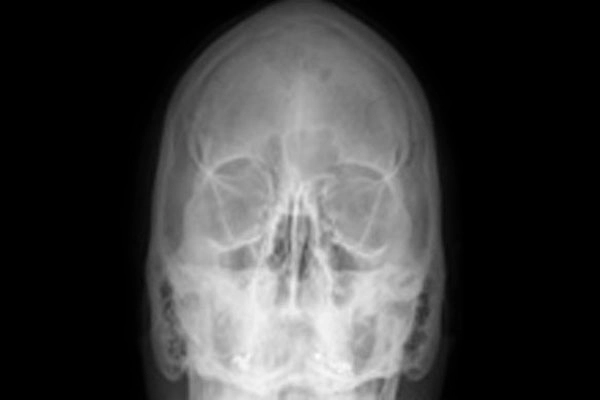
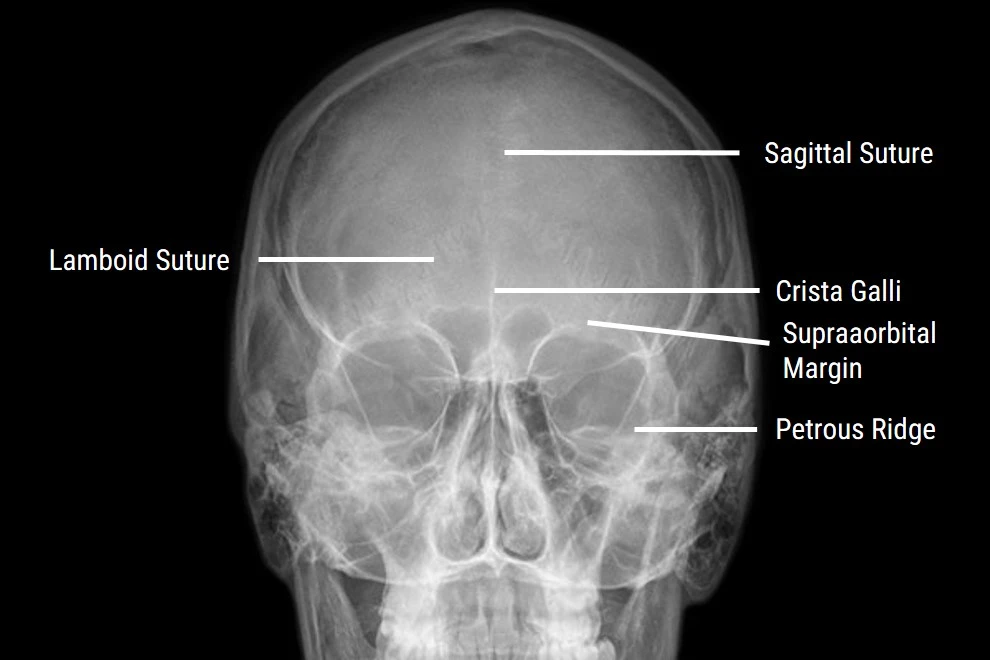
- No visible rotation by the symmetrical nature of the orbits
- Innominate lines should be equidistant from the lateral borders of the orbits
- Petrous ridges projected in the lower third of the orbits
- No tilting should be evident; an imaginary line through the petrous ridges should be horizontal
- Fractures and pathologies of the skull; designed to better visualize the paranasal sinuses, especially the frontal sinus
We hope you’ve found this a simple, clear, and easy to use reference for sinus X-ray positioning. For your convenience, we have also created a free downloadable infographic available below. Download, save, and share with others! And if there’s a guide to other less common X-ray procedures that you’d like to see (such as our guide to radiographic positioning for toes), feel free to reach out to us!
| Free Downloadable Paranasal Sinus X-Ray Positioning |  |

